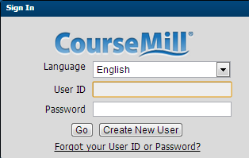
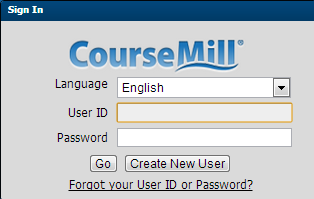
Shown below is our standard Log-in dialog.
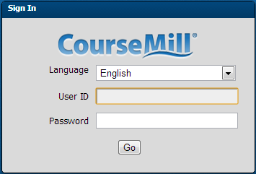
Depending on how your site was configured, the log-in dialog could also look something like this (Create New User button and the Forgot your User ID or Passwords link not displayed):
To log on to CourseMill, do the following:
Select your language – this will display CourseMill in that language
In the User ID field of the log-on screen, type the User ID you were given.
In the Password field, type the password you were given.
If you cannot remember your password, click the Forgot your User ID or Password? (if available) and your credentials will be emailed to you.
Click Go and you will be directed to your student interface (see Student Interface Overview below.) If this is your first time logging in, you might be directed first to the Terms of Use Policy (see Terms of Use Policy below) if your organization requires it.
If you do not have a User ID and there is a Create New User button as shown above:
Click the Create New User button which will begin the self-registration process.
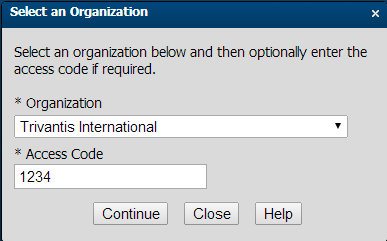
If there are multiple organizations in the CourseMill site, you first need to determine which organization you belong to. The following screen will display asking for this input. Select the organization from the drop down list. If your organization gave you an access code – enter code and click Continue.
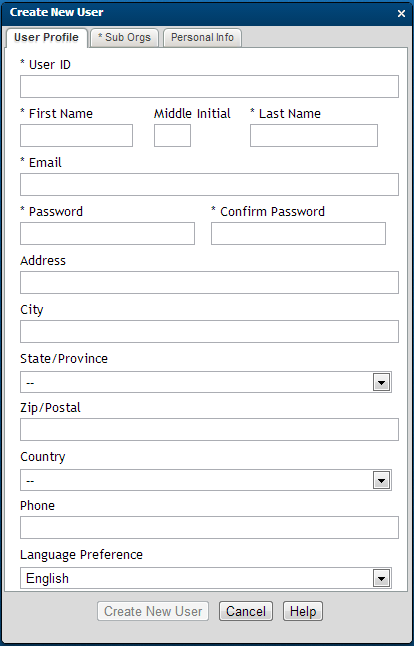
Once you click the Continue button, a set of data entry screens will display in which you will need to fill in certain information. Depending on how the organization is set up, you may see one, two, or all three tabs as defined below.
User Profile – General demographic data. Mandatory fields are marked with an asterisk.
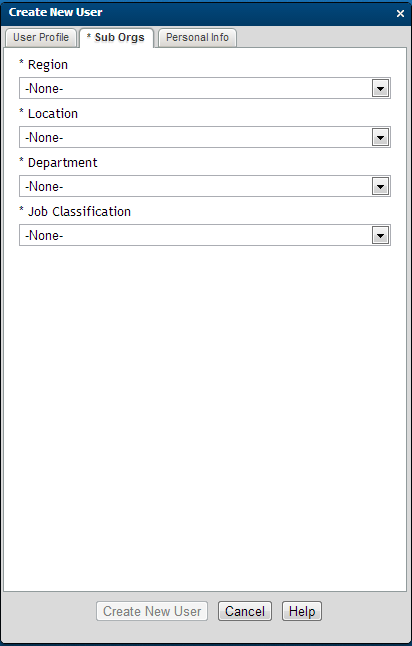
Sub Orgs – Further definition of your demographics. This is normally the drop-down list of values that were created by your CourseMill administrator.
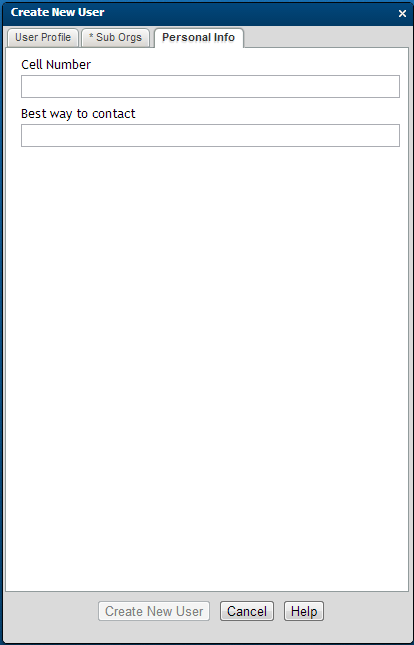
Personal Info – Additional information your CourseMill administrator is asking. The screen shots below are just samples of what organizational data you might be asked.
|
|
|
Once all information is keyed in, if your organization requires it and if this is the first time you are logging in, you might be directed to a Terms of Use Policy acceptance dialog such as the one below. If not, you will be directed to your student interface.
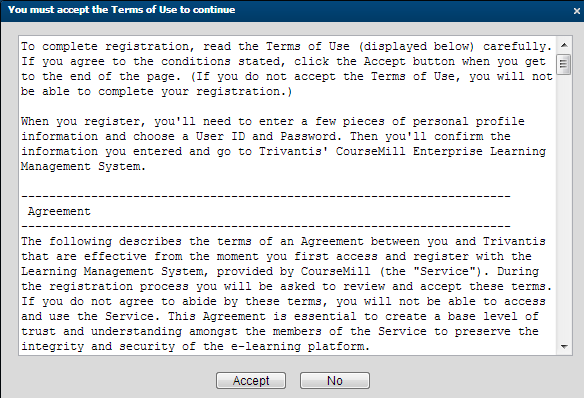
Once the user clicks the Accept button, or if this page is not mandated, their UserID is created and they are taken to the student interface.
Your student interface may have one or all of the following tabs as highlighted below:
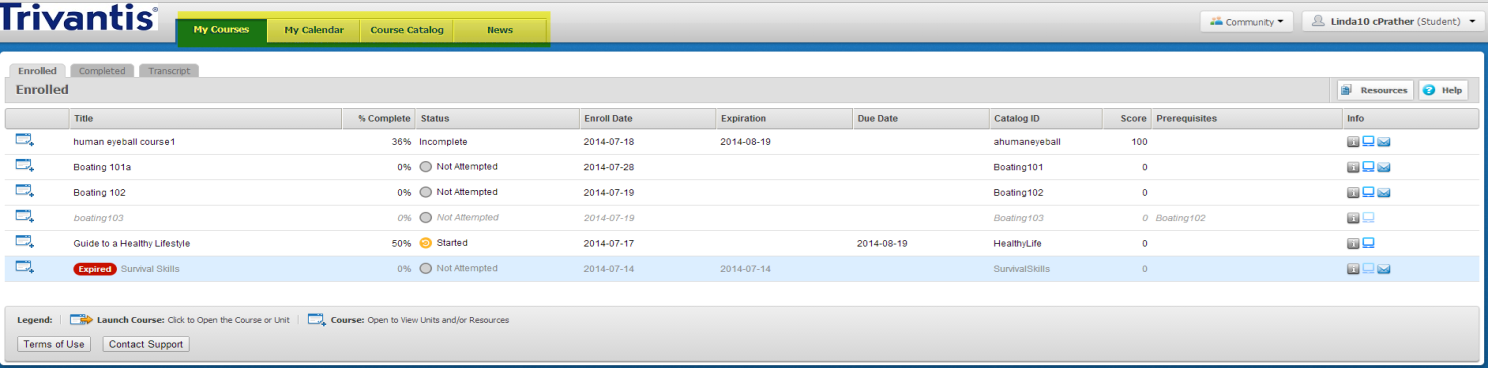
My Courses – all the courses and curriculums you are or have been enrolled in
Course Catalog – all the available courses and curriculums
Calendar – in calendar format courses you are enrolled in
News – the news page your organization chooses to display
Mail – your email messages if you are using internal CourseMill mail (not shown)
You may also edit your profile by clicking the Edit Profile on the top right portion of your screen as highlighted here:
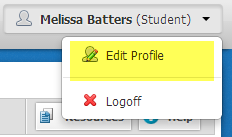
Typically a student uses this to change their password. Once clicked the following screen will display.
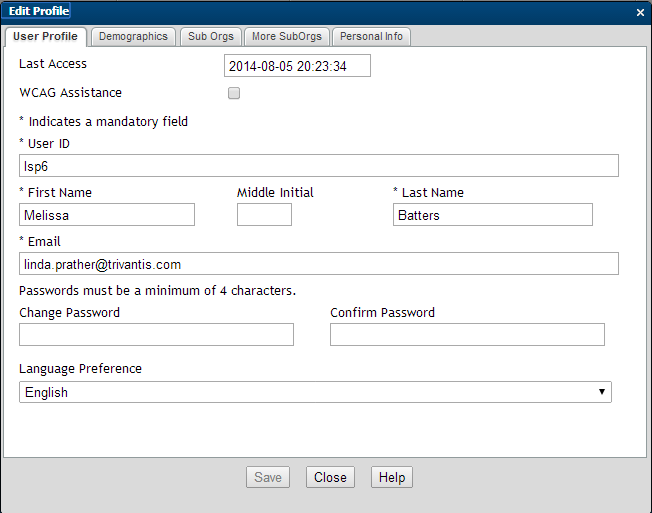
This display screen also may have one of four tabs as shown above– depending on what your organization has set up. Your organization determines which fields you will be able to update.
User Profile – First and last names, email, password, language preference
Demographics – Address, City, State/Province, Zip/Postal Code, etc.
Sub Orgs – organizational hierarchy
Personal Info – various fields your organization has chosen to ask
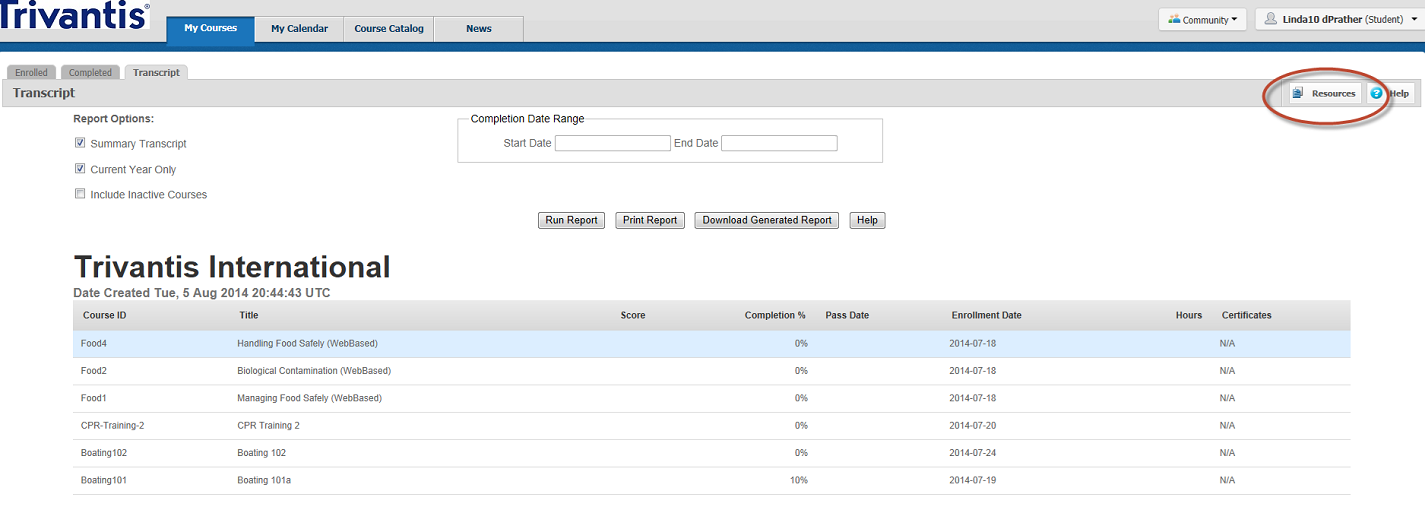
The My Courses dialog displays all the courses and curriculums that you are currently enrolled in in the Enrolled tab. This will show courses that have expired as well. The Completed tab shows the courses and curriculums you have completed. The Transcript tab displays the student’s transcript in HTML format. This will allow you to view and download a complete transcript of all your training activity recorded in the system. Shown below is a summary version. The icons on the left designate whether it is a course or curriculum. The legend for these icons is shown at the bottom of the dialog. In addition, if the organization has set up custom links, they will display at the bottom of the page as shown below (Terms of Use and Contact Support).
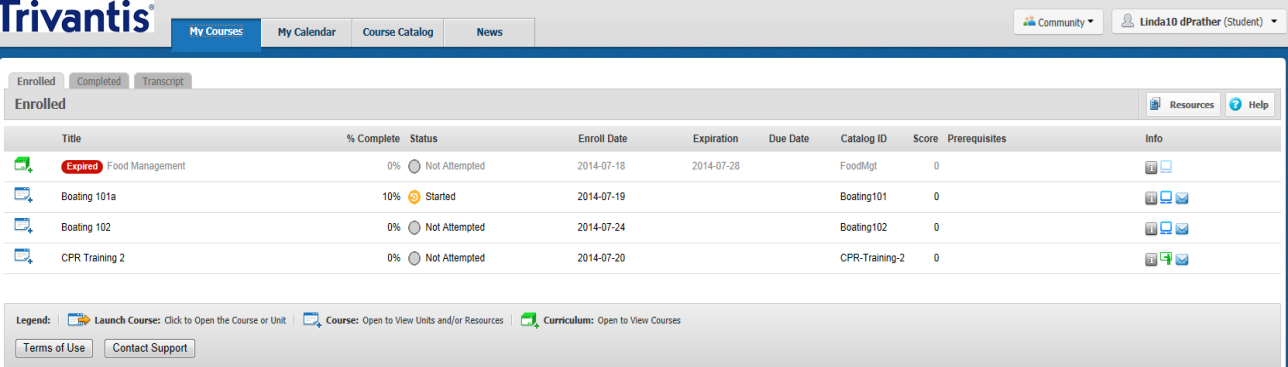
If a course is italicized and grayed out, it could mean any one of the following situations:
The course begins in the future so you cannot access it until the start date. Look at the course information box to see its start date.
The course is expired and you no longer have access to it. Email the instructor to see if you can get an extension (see Mail Instructor Option below).
The course or curriculum contains no content.
The course is dependent on a pre-requisite course or curriculum.
The student can sort this list of courses by clicking on the display headings.
To launch the course, click the launch icon  and the course will begin. The course will launch in a separate window. Use the course navigation buttons to move through the course. Click the Course Exit button when you need to leave the course. You will be brought back to your My Courses tab where your completion status will be updated based on how much of the course you completed.
To unenroll, click the information icon  to the right of the course from which you want to unenroll. This opens the Course Details page. Once open you will see an Unenroll button (only if the course is set for self-registration). If the course is set up as Administrator enrollment only, you will need to contact your instructor/manager to unenroll you.
After clicking the Unenroll button, you will be presented with a confirmation dialogue box to which you need to answer Yes or No. Selecting Yes will remove the course from your My Courses list.
To send an email to an instructor of a course, click the blue mail icon  to the far-right of the course you have selected. The following screen will be displayed:
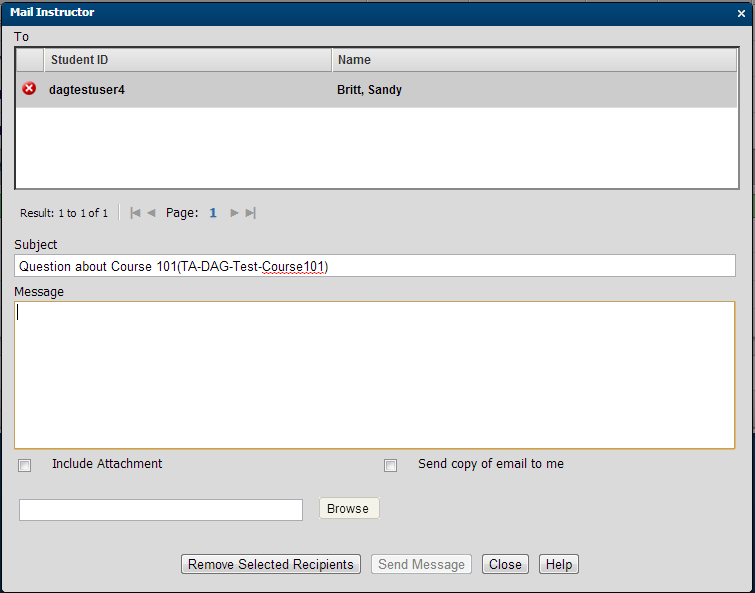
The instructor will be displayed along with a prefilled Subject. The Subject line can be modified if desired. Be sure to fill in the message text box with your message, include an attachment if needed, and select the Send copy of email to me if you would like to be copied.
Once you have typed in your message, the Send Message button will be enabled for you to select once you have completed the message and are ready to have the message sent.
Clicking the Transcript tab will display your transcript in HTML format. You, again, may sort your courses in any order using the column headings. Shown below is a sample transcript display.

The Report Options check boxes will allow you to see a more detailed version. You can also print or download the report to an Excel file. If any courses have completion certificates attached to them, you will be able to click on the PDF symbol to the right of the course.
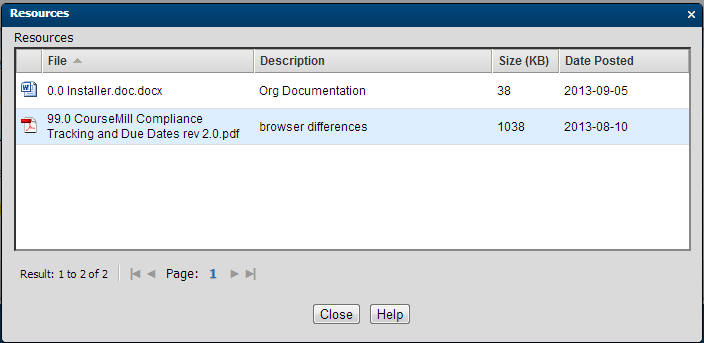
Clicking this button will allow you to view the organizational resources provided to you for your reference.
They could be one of many different file types listed, such as a Word document, Excel spreadsheet, PDF file, and so on.
The Course Catalog page displays all the courses and curriculums that are available to you to enroll in. If the course is italicized and grayed out, it is a course that you are already enrolled in and you will see the Enrolled checkmark to the left. If Preview is turned on, you will also be able to use that button to preview the material of the course.

If the list of courses and curriculums is lengthy, you can narrow your search by entering in filters into any of the search fields at the top part of the screen. Those items that are listed in green font are curriculums. Courses are listed in black font.
You can register or enroll in a course one of two ways:
Click the Enroll button to the left of the course, another dialogue box will appear, click Yes to enroll.
Click the gray information icon to the left of the desired course/curriculum, another dialog box will appear, click Enroll to enroll.
Once enrolled in a course, the course on the Course Catalog page will be grayed out, and the course will now appear on your My Courses page. Navigate to the My Courses tab to launch the course.
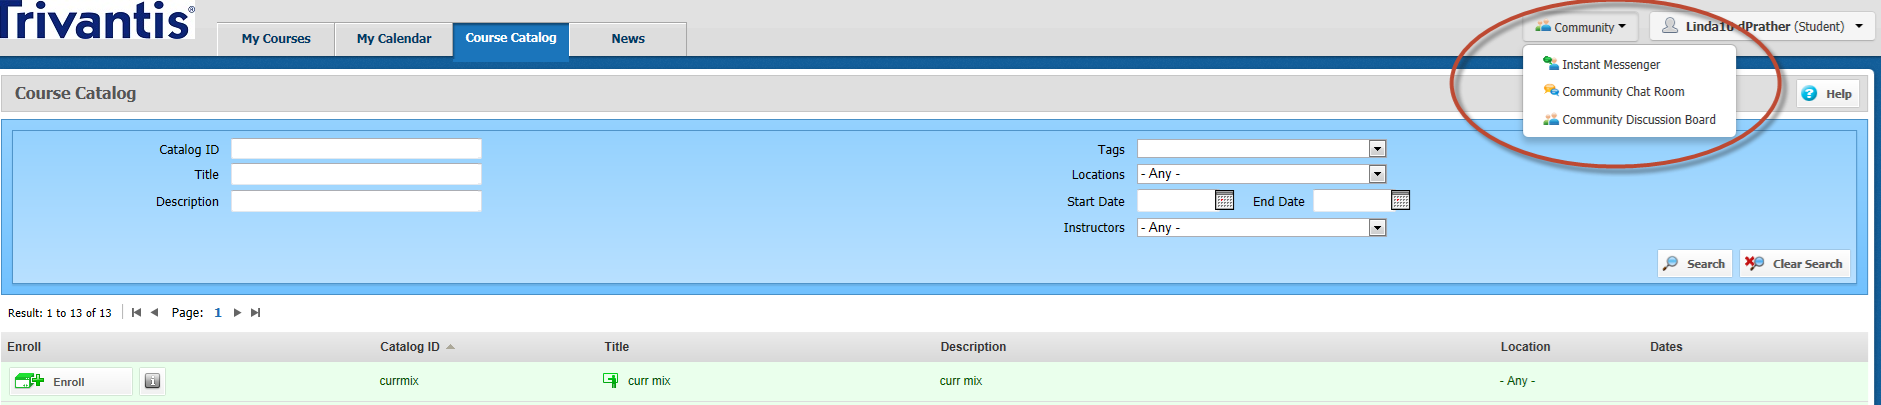
The Community areas will be available to you if your organization has chosen to provide you with either:
Organizational resources like documents, or videos
Discussion board functionality
Instant Messaging, or
Chat Rooms
To access your community resources for the organization, click on the corresponding selection in the top right of the screen.
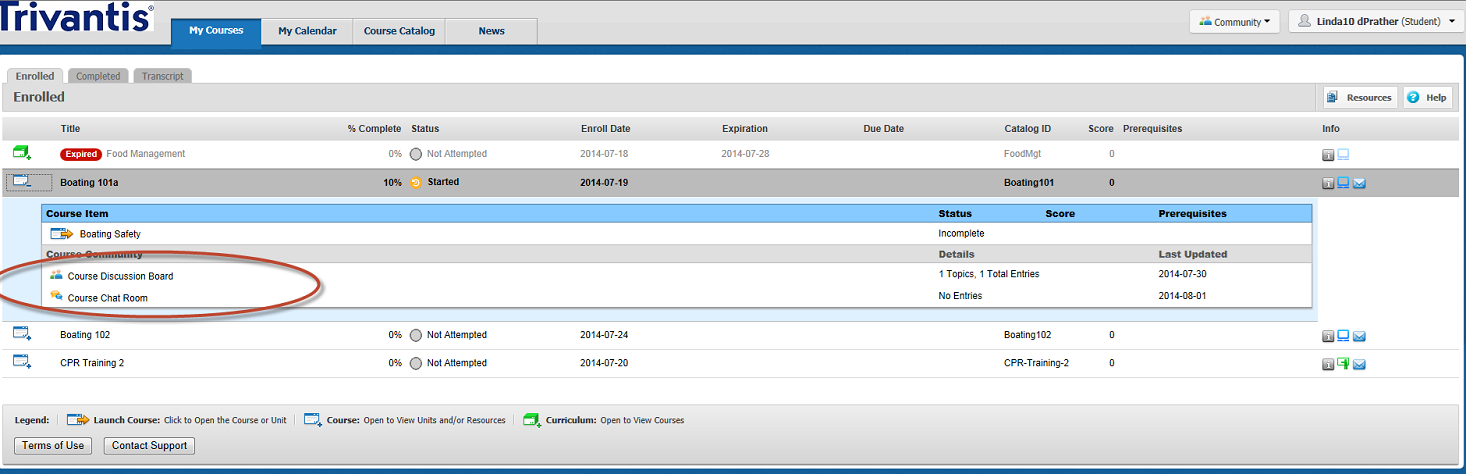
To access the community resources tied to a course, you will find them underneath the respective course in your My Courses page:
Organization and course resources are there just for your reference. Resources could be one of many different file types (.doc, .pdf, etc.).
If you have not read a resource, there will be an icon showing to the right of the resource stating it is New which will stay there until the document is actually read. To read the document, just click on the file icon to the left of the document name.

If a resource was updated since the last time you viewed it, there will be an icon to the right of the resource stating that it had been updated.

Discussion Boards allow you to communicate by responding to topics. Conversations are grouped into topics containing the main topic and all related replies. Discussion boards can be at the organizational level or the course/session level.
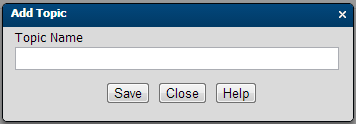
To add a new topic to a discussion board, click the  icon to the left of the discussion board listing. The Course Discussion Board dialog box displays. Click Add Topic and enter your Topic Name in the space provided and click Save.
To join a discussion click the icon to the left of the discussion board listing. The Discussion Board text entry dialog box displays. Click the topic you want to comment on and click Add Entry. The Add Entry dialog box opens for you to type your comments. Click Save button when prompted.
To open up a chat room, simply click the blue and yellow icon  to the left of the listing and the chat board will open up.
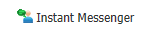
To open up the instant messaging capability, click the Instant Message button  on the top right of your screen and the message board will open up for you to start your conversation.
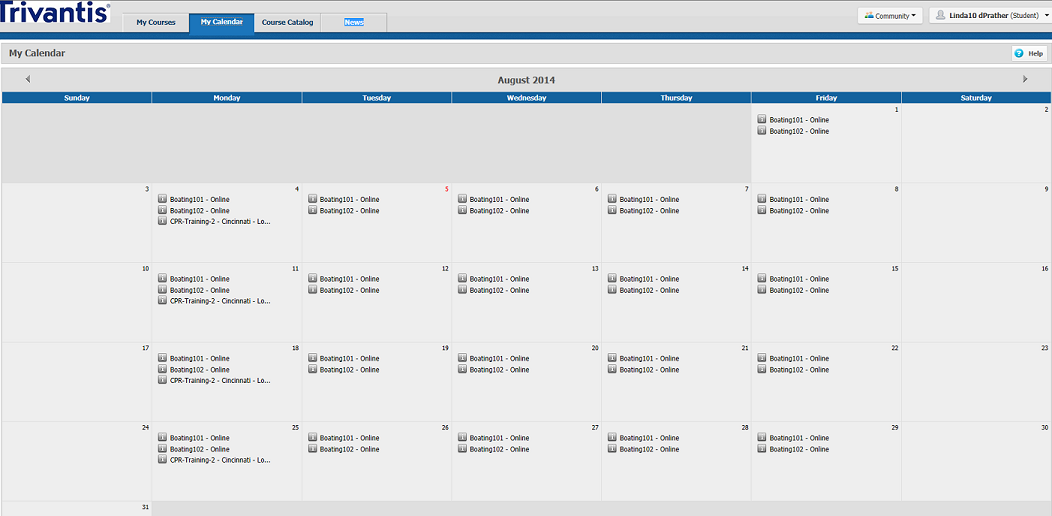
The Calendar tab is just a calendar visual of all the courses you are enrolled in.
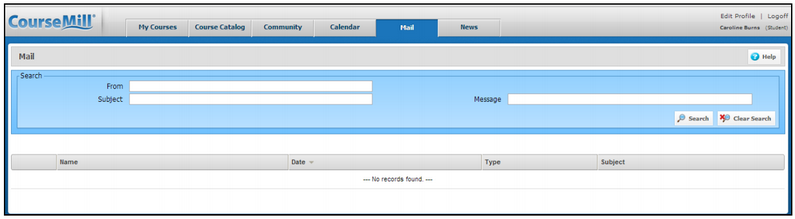
If your organization has set up internal mail within CourseMill, you will see the Mail tab. The dialog will display any messages that have been sent to you.
The News tab is a news page set up by your organization.
|
If you cannot remember your password, click on the Forgot your User ID or Password and your credentials will be emailed to you. |
First, try closing out of the course and out of your Internet connection. Then, re-launch your Internet connection and the course. If the problem continues, call your administrator or Help Desk.
Your User ID was most likely given to you by your administrator – check with them or click the Forgot your User ID button.
It depends on how the course was programmed. Usually you can exit a course at any time, and your location will be bookmarked. When you return to complete the course, it will resume at the point that you left. Be sure to exit the course, using the exit instructions for the course. If you exit a course by terminating the Internet connection, you will lose your place in the course or the LMS might not record your completion.
If the e-mail feature is enabled for your course, you will see a blue mail icon to the right of the course. Clicking that icon will bring up a message dialogue box where you can type your message and click Send. If email is not enabled for the course, you will have to contact the instructor via your company’s email system.
No special software or “plug-ins” are required to access CourseMill. All you need is a network connection. It is recommended that you disable browser pop-up blocking.
© Copyright Trivantis Corporation 2015